Table of Contents
Strain Gage
Summary
Introduction
A strain gage (alternatively: strain gauge) provides an extremely simple and accurate way to measure even slight deformation of a solid surface or object. It is a relatively simple transducer that varies slightly in resistance when compressed or stretched, and can be bonded (using adhesive such as epoxy) to metal, plastic, wood, glass or other solids. The most common gages measure strain only in one direction, but commercial gauges containing more than one sensor on a substrate, arranged to measure strain in different axes, are available.
Strain gages are classified by:
- Material (usually bonded wire, metal foil, or semiconductor)
- Physical size
- Resistance
- Gage factor (defined as the ratio of the fractional change in resistance over the fractional change in length along the gauge axis).
Due to their extremely small solder tabs, smaller gages can be very challenging to attach to leads. As the output voltage changes are so small, it is recommended that shielded cable be used for leads to reduce noise. Temperature changes are also a potential source of error, as the resistance of the gauges will change. “Temperature compensated strain gauges” are available, but must be matched to the thermal expansion coefficient of the material to which they will be bonded; alternatively, a 1/2 or full Wheatstone bridge circuit (using “dummy strain gages”) can reduce error caused by temperature changes.
Strain gauges differ from flexion sensors in that they are constructed from metal wire or foil rather than conductive inks. The wire or foil is constructed in a tightly-spaced grid attached to a non-conductive backing, which must be bonded (using epoxy adhesive) to the object to be measured. When the gage is stretched or compressed, it changes in resistance due to minute changes mainly in the cross-sectional area of the wire or foil. Strain gauges are much more sensitive than bend sensors, but with a correspondingly smaller change in resistance.
Strain gauges made out of semiconductor material like silicon or germanium take advantage of the piezoresistive effect, a change in resistance that is greater than what can be explained by simple geometric deformation. The piezoresistive effect occurs because on the atomic scale, the change in volume causes the energy gap between the valence and conduction bands changes such that some particles lose their role as charge-carriers. The change in resistance due to piezoresistance is approximately two orders of magnitude higher than in non-piezoresistive materials, therefore semiconductor-based strain gauges are much more sensitive to deformation. Unfortunately, as these type of sensor has higher sensitivity to temperature, the environment temperature must be controlled and stable.
Signal conditioning
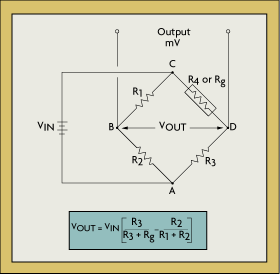
Strain gauges are often used in half- or full-Wheatstone bridge configurations, as this increases the output voltage swing and, provided that the bridge arms remain at the same temperature, eliminates error due to temperature change. Also, in order to obtain useful data, the signal is usually amplified considerably. An instrumentation amplifier such as the Texas Instruments INA128, or an instrumentation amplifier circuit, can easily amplify the signal sufficiently.
Other Applications
Strain gauges are also used in the construction of commercial load cell and air pressure sensors. Yokono and Hashimoto [SMC'98] used strain gauges for center of gravity sensing in a load cell–like application.
History
The strain gauge was invented by Arthur C. Ruge and Edward E Simmons in 1938. Ruge developed the idea as a way to measure the effects of seismic activities on water tanks. Simmons and Ruge developed the idea simultaneously and shared the initial patent.
Devices
| Omega SG-3/350-LY41 | |
|---|---|
| Sources | Omega US$ 61 for 10 |
| Description | Encapsulated Uniaxial Strain Gauge with Solder Pads (grid: 3.8 x 2.0 mm). |
| Datasheet | Omega Strain Gages Specifications Chart, page 3 |
| Resources | |
| Notes | Very small and difficult to solder - tinning the gauge first is absolutely essential. |
| Variants | |
Omega SG-7/350-LY41 (grid: 7.0 x 3.5 mm)
Omega SG-13/350-LY41 (grid: 12.5 x 5 mm) |
| Vishay/Micro Measurements 375UW | |
|---|---|
| Sources | Intertechnology Inc. |
| Description | General-purpose CEA-Series gage. Exposed solder tab area 0.10 x 0.07 in (2.5 x 1.8 mm). |
| Datasheet | |
| Resources | Interactive Guide to Strain Gage Technology |
| Notes | |
| Variants | Many different sizes and varieties. |
Media
References
- Omega Engineering, Inc. (2000). The Pressure Strain and Force Handbook. 2nd ed. Stamford: Omega Engineering Inc.


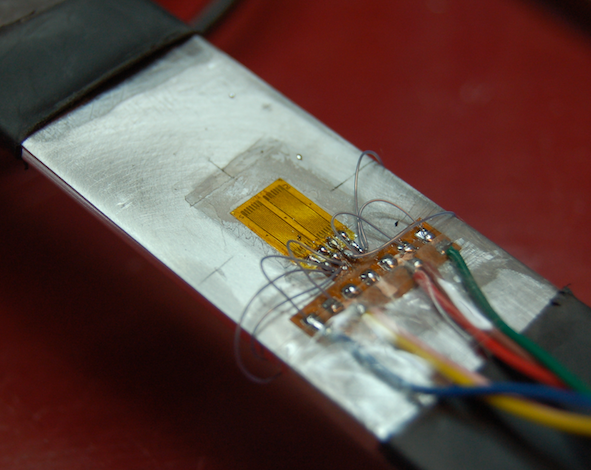
![Metallic Strain Gages applied to [[http://idmil.org/projects/rulers|The Rulers]] (IDMIL's Musical Digital Instrument) Metallic Strain Gages applied to [[http://idmil.org/projects/rulers|The Rulers]] (IDMIL's Musical Digital Instrument)](/_media/sensors/sg_rulers.jpg?w=200&tok=36a320)